Making Usable Space. Making It Pretty (Phase I)


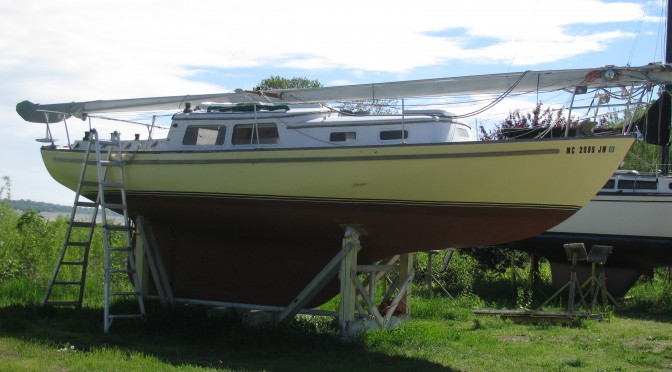
The Cal 30 was originally equipped with a 14′ boom with end-boom sheeting and a traveller that went across the aft area of the cockpit.  Since a previous owner had modified the sail plan and shortened the foot by 4′, the sheeting is now through a cabin top winch  and hard mount near the companionway (no traveller, no problem).


So the huge space at the stern of the boat was not really usable for anything but sunbathing; the interior space was functionally not available since the only way in was to:

  • Chuck things through the tiny access behind the rudder and, when access was necessary, sticking one’s head (shoulders wouldn’t fit!) through and fumbling in the dark for whatever, or
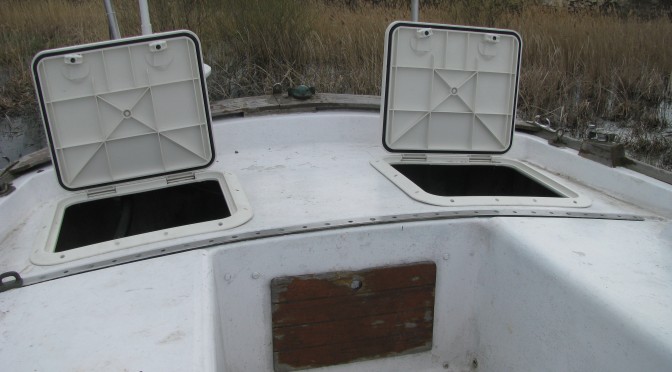
  • Crawl through the quarter berth on either side, nearly suffocate from squeezing through the tiny passage hole in the bulkhead and fumbling in the dark for whatever.IMG_0708The solution was to carefully measure, look at available Bowmar access hatch sizes, measure twice and cut two large holes in the afterdeck.The result was complete access to the stern of the boat for storage, wiring, plumbing or whatever. The hatches are large enough for me to open, step in and contort myself into working on nearly everything is the last 20% of the boat length.I installed them temporarily earlier and decided that this area would be the first for the complete makeover with shiny white smooth paint and white KiwiGrip on the nonskid area.

    But the many, many, many coats of paint had to be removed. IMG_0709 IMG_0710  IMG_0712 What a mess. What a pleasant project to do on one of the most spectacularly beautiful days of the summer.

    Armed with plenty of cold drinks in my Engle and some Aircraft Fiberglass stripper, I made two applications and removed many layers of paint.

    Surprise, surprise! There is actually non-skid underneath all of that goop – the kind that is embossed into the fiberglass at the time the hull was built.IMG_0861 IMG_0862 IMG_0863 IMG_0864 IMG_0865

    Doing the whole topside will be a very labor intensive and messy project, but I can already picture who beautiful the old girl will be. I’m eager to sand the smooth area and get the first coat of EZPoxy (one part for base coat) on so it can be taped off for application of KiwiGrip in the non-skid area. Then, the hatches can be permanently installed. I think I’ll make some snap on Sunbrella colors for both of these to make a really weathertight afterdeck under the cusom cushions that are plnned.
Baby Steps But Making Progress

I looked at the calendar today and have ony 4 full weeks before my “retirement” and devotion of full time efforts to pre-departure activities.

After looking at the list from the last post, I realized that it only included about half of the items I have in my head for accomplishment before I depart for Chicago and beyond.

But, I have lots of confidence based on excitement combined with knowing how I’m going to do each task that gives me plenty of motivation to continue.

Tomorrow (Tuesday, 7/14) will be my first visit to Amalia for about 10 days and I have a tentative list of what I need to get done by being there all day.

First and foremost, I will be delivering my Engel and making a temporary/permanent installation.  It has been sitting in my breakfast room off the kitchen for the past few months happily keeping its cool and waiting for new adventures.  Its about time to give it some!  Along with keeping some sandwich fixings, condiments and the like available, it will be nice to have cold drinks and no need for ice.  While the solar installation will make me energy indepenedent with the fridge once it is finally installed, it will run on shore power now and whenever I am plugged into it while on the trip.  It has smart circuitry which automatically switches to 12V whenever 120V is unplugged.

Hopefully, I will be able to make a final installation of the davits so I can mount the solar panel, route wiring and complete my electrical installation.

Taking off deck hardware and stripping the aft deck is also on the list so I can use topside paint and KiwiGrip on the area and make a permanent installation of the two access hatches there.

Every little bit helps!!!


In the water but creating to do lists

While I still have to adjust my transmission linkage so I can reach reverse properly, I did manage to splash Amalia last week and get her over to slip 114 for more work, preparation and chilling out.

I don’t know why I have always had so much of an aversion to making lists.  I don’t have a problem with using checklists as a pilot, I occasionally make a list of errands to be run and the like – but sitting down and making plans by generating an intimidating list of what needs to be done, when and in what order – is something that does not come natural to someone like me who is free-form and non-linear in my approach to accomplishing tasks.

If you notice any of the items on this list with strikethroughs, this means that at some time before I left, I actually accomplished this item.  They don’t all have to be done prior to departure, but the more the better!

Still, I know that the time has come to create a huge lists of tasks that have to be done (and those that can wait to be done on days of rest enroute) before I go mastless across Lake Michigan to Chicago in 12 weeks or so.

While I am fully aware that making this list may serve to convince me that this can’t all be done (maybe it can’t??), I think that some more organization will help me to focus on what time I have available and get things done.

In no particular order, but realistically summarizing what needs to happen by mid-September, I need to:

  1. Adjust my transmission linkage and verify that everything is working properly.
  2. Install my new water pump impeller.
  3. Mount my two huge battery boxes and 4 6V batteries to create a new house load bank in the stern of the boat.
  4. Finish my installation of the davits.
  5. Install the 140W solar panel and bring wiring inside the boat.
  6. Wire to install charge controller.
  7. Find best installation for inverter and connect up.
  8. Decide on installation location for Engel refrigerator and wire up 12V and 110V power sources.
  9. Pull all hoses off water tank and replace plumbing to head and galley sinks.
  10. Install outside fill for water tank.
  11. Procure and install washdown pump system.
  12. Strip stern area from old traveller track to transom, sand, tape and paint smooth color.
  13. Use Kiwi-grip to do non-skid area there.
  14. Permanently install the (temporarily installed) access hatches.
  15. Procure and install Sirius antenna in good location.
  16. Build one or two mast pulpits out of 1″ tubing to temporarily serve as lash-down point for 4 jerry cans and possible location for hailing horn.  Run wiring to hailing horn from radio.
  17. Find location to install 4 or 8′ fiberglass secondary antenna to use as primary when mast is not aboard or rigged.  Run wiring to cabin.
  18. Purchase another identical bow roller and build another mount platform.    (After installing new Rocna on existing bow roller, decided that backup would be Fortress or Danforth and no roller needed.)
  19. Purchase 30′ of 5/16″ chain for bow anchors.  Move old chain to use with stern anchor.
  20. Using wiring coming from mast stub, rig up anchor light and auxiliary lighting to be used when mast is down/not present.
  21. Strip bow to forward coach house, paint glossy and kiwi-grip non-skid.
  22. Strip and or sand coach house top deck and sides.  Paint gloss and kiwi-grip non-skid.
  23. Kiwi-grip deck aft to end of coach house.
  24. Sand, strip and paint/kiwi-grip cockpit.
  25. Make arrangements to bundle up mast and ship to Mobile.
  26. Investigate adding small 12-18 gallon fuel tank forward for more fuel range and ballast against weight of second house bank.
  27. Plumb sink drain from head sink to tee in through hull which supplies input flushing water to head.
  28. Relocate tiller pilot from cockpit seat to cantilever bracket and wire interface to Navico chartplotter.
  29. Make new cockpit cushions.
  30. Replace all 110V wiring.  Add outlets for use on shore power or inverter only in galley, head, main saloon and quarter berth.
  31. Make permanent installation of Standard Horizon radio including remote and hailing speaker.  Install MMSI and verify operation.
  32. Install fuel gage in new tank and connect to gage on cockpit instrument panel.
  33. Install Bimini and make zippered connection to dodger.
  34. Make removable sun screens and weather curtains for aft portion of bimini.
  35. Re-do interior main saloon cushions.
  36. Install new counter top laminate on table, head sink and galley area.
  37. Install new 110V/alcohol stove and create storage area behind.
  38. Survey kitchen equipment and purchase any missing items.
  39. Determine location for microwave with two available plugs to allow occasional use on inverter.  Enable use of coffee port and electric tea kettle with the same outlets

While this is not a comprehensive list of everything that needs to be done, it is a good attempt to create some organization to the potential chaos of the summer and actually start the Loop in September.

Wish me luck!

Out with the old dinghy, in with the new

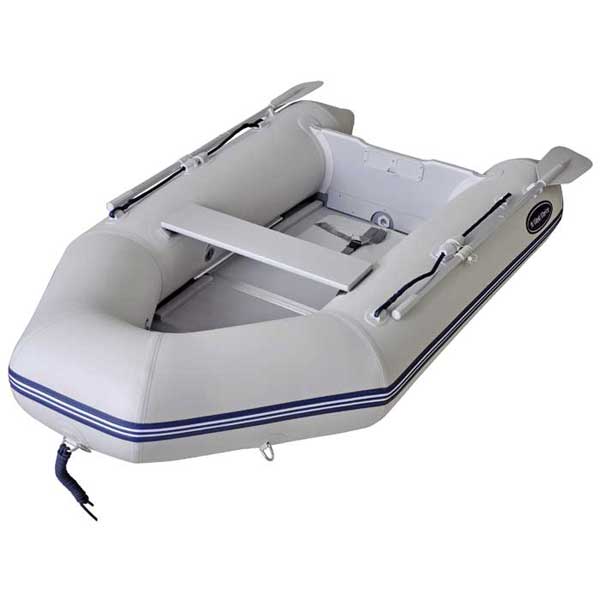
After adding my dinghy davits (upcoming post on installation), I decided to replace my Mercury Hypalon dinghy with heavy 15 Hp outboard with something smaller and lighter.

Posting the boat, motor and trailer on Craigslist resulted in a quick sale to a sailor in Manistee who met me down in Muskegon last Saturday and handed over the full purchase price!

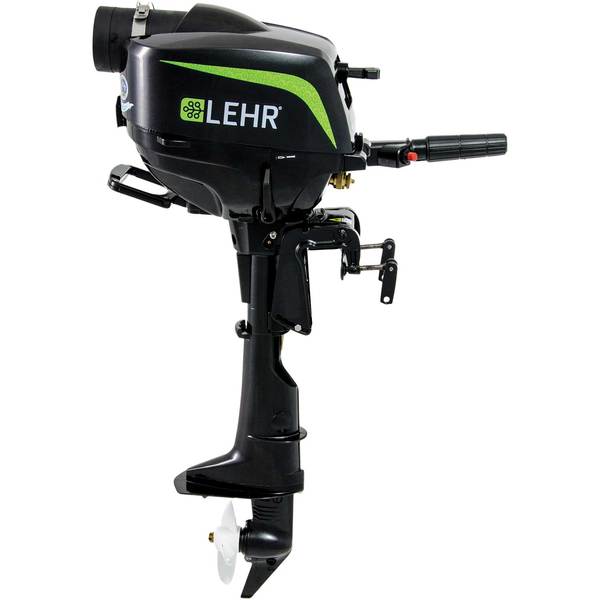
Since there was a $200. mail in rebate from WM on the purchase of an inflatable and outboard motor, (and after verifying that my employee purchase would qualify for the rebate), I ordered a smaller wood floor sportboat and one of the new propane-powered Lehr 2.5 HP outboards.

Lehr2.5
Lehr 2.5 HP outboard runs on propane from disaposable container or larger LP bottle.
Amalia's new PSB275 hard floor dinghy.
Amalia’s new PSB275 hard floor dinghy.

Getting Ready For The Splash

With little time off from work and a list of pre-splash projects, I am on the list for possibly paying a fine to the Conservation Club by not being in the water by June 1 this year.

Oh, well, I can only be in so many places at once!

Now that I have removed the old, bronze, non-functional thru-hull transducer and installed my new one (more of a job than you might think), I can move on to the last few items that have to be done before Amalia is in the slings.

First, I have to reinstall the thermostat, fill and bleed the cooling system, and activate my cockpit-based alternative cooling water supply to start the Atomic Four for the first time since last October.  The batteries are now fully charged and ready to go.  Some of the other maintenance items like an oil change, fuel filter change and carb overhaul can easily wait until I’m at home in slip 114.

Since I adjusted the transmission forward gear engagement last fall and didn’t get it quite right (not enough travel to engage reverse properly), I will also need to do some tweaking here before I can move the boat in the water.

All of the drilling that I needed to do on the stern while on the hard is done and my shiny new davits are temporarily installed awaiting another set of hands to help me tighten up all the mounts on the stern.

Although it will be in the way a bit, I’m going to leave the mast down so I can replace more of the standing rigging.  Strongly anticipating shipping the mast to Mobile instead of leaving it on deck for the first 1200 miles of the trip, I might not even put it up this year.

I have lots to do before my tentative Labor Day ‘ish departure!

A Busy Winter For Upgrades

The winter of 2015 turned out to be very busy with a nearly full-time work schedule at West  Marine in Holland and Grand Rapids with a few days in Muskegon as well.

After buttoning up Amalia with the very patched old canvas cover, I had to make more patches and another piece of the cover to take care of the severe location along the outside seawall.  The breeze was very strong here over the winter and the amount of snow that accumulated on the cover caused a variety of tears require both band-aid repairs and an additional tarp to cover the midsection.

All in all, she survived another November to April cycle and saw the sunshine again in late April

Purchases for a planned spring/summer installation include:

  • A Bimini
  • An Engel MT43 Refrigerator
  • A 2000 Watt inverter
  • Two dual 6V battery boxes
  • A 140 Watt Solar Panel and 28A controller
  • Garhauer Dinghy Davits
  • A pair of access hatches for the rear deck area
  • AC cabling, outlets
  • A new Indigo Thermostat system
  • And a continual list of miscellaneous stuff.

Along with installing all of these new items, there are plenty of maintenance items to be done – some before launch and some in the slip.